My lovely Followers

Monday, 2 September 2019

Steampunk Top Hat Tutorial

Good morning crafty friends, I have promised to do a quick tutorial on how I made this steampunk top hat
from this coffee tub

I have written most of the information on each photo, so don't miss any pic out, and then some in between, be warned it has lots of photos ☺️ so grab yourself a brew, get comfy and start scrolling and reading. 


Firstly I cut a circle larger than the base of the tub out of a sheet of thick card and glued it on the bottom. 


I used Das air drying clay, but any clay that can be used in a mould will do, e. g hearty paperclay, clay made from Powertex and stone art. You're going to coat it in Powertex so it will become quite durable. 


Once dry I brushed over the whole piece with Powertex pigments mixed with their varnish


To decorate I used more of KatySue design moulds, the distressed cogs and the rusty pipes mainly, these are from their new Industrial Steampunk range along with the metal sheet mould used to cover the hat. 
I moulded them and once dry I painted them to look rusty and old and added some Powertex pigments and guiding wax, then stuck them on, all round and on the lid too. 


I made the goggles by covering 2 circles I cut from a kitchen roll and covered them with clay moulded from the same metal sheet mould, I added acetate behind each cog then stuck on to kitchen roll circles. The middle piece and side straps are actually made with a hinge mould also by KatySue Designs. I then added a little clay key and a flourish on each lens. 


So there you have it a Steampunk Top Hat that not only looks good but is also useful for storage. Even better made from rubbish that we would normally throw away. 
Just call me a Womble ;)

Even though this is a tutorial I'd still like to enter it into some challenges, hope thats ok.


Thanks for looking, I'd love to hear what you think, or if you have any questions, feel free to leave me a comment. 
Big hugs Sue xx


Friday, 22 February 2019

Slightly rusty but still pretty

Here's another of my samples - 
A journal cover.
I couldn't make up my mind when I made this whether to keep it pretty with a bit of  sparkle or to go rusty grunge. So I did a bit of both 😁
I used the new rose embosser from Katy Sue Designs and some Starlight paint and some Rusty patina paint both from Imagination crafts.

Challenges:
Creative artiste mixed media challenge
Rhedds creative spirit
Altered eclectics

Thanks for looking 
Hugs Sue xx

Goblet fit for a queen

Good afternoon crafty friends, today I would like to share a goblet I made using the new moulds from Katy Sue Designs 


I do love decorating glasses, and the new peony embosser is simply stunning. I used Hearty clay and painted with Starlight paint from Imagination crafts.
Please check out the new range, Antony will be demonstrating them on Hochanda as a One Day Special next Wed 6pm and 8pm and then on Thursday at 9am, 1pm and 5pm.

Challenges:
Creative artiste mixed media challenge
Rhedd screative spirit
Altered eclectics
Hugs Sue xx

Sunday, 27 January 2019

Last sneaky peek 6

Well this is day 6 of my sneaky peeks and my final sample.
I'm always making magic wands, so felt I had to make one using the claw mould.


You can see the fantastic detail on each of the claws.


Dont you just love it ?

Not long now, you'll soon be able to get your own trio claw mould, the dragon eyes mould and more new moulds, never seen before. 
Antony Minnis will be showing the new designs,my samples and lots more amazing samples by Katy Sue Designs, very talented design team on Hochanda from Tues 29th 6pm and throughtout Wed 30th. 
Dont miss your chance to purchase some amazing moulds, I think these will be very popular.
Thanks for looking
Hugs Sue xx 


Saturday, 26 January 2019

Sneaky peek day 5

Heres my sample for today, its another notebook.
Using half of one of the new moulds, one eye, with another couple of moulds by Katy Sue Designs, fish, seaweed and seahorses.
I moulded them out of Hearty clay and once dry, painted them with Starlights by Imagination crafts.
The shells along the bottom are real shells.


In my mind ,this must be a water dragon :)


Ive only one more sample to show you so dont forget to come back tomorrow.

I'm entering these challenges

Thanks for looking
Hugs Sue xx


Friday, 25 January 2019

Katy Sue Designs sneaky peeks - Day 4

More inspiration for you.
You know how I love making my notebooks.
This one was made using the two new moulds along with the leaf mould, also by Katy Sue Designs

I used Powertex on the material to make it dry hard and hold its shape.


This is one of my favourite samples, which one is yours so far?

Challenges I'm entering:

Thanks for looking
Hugs Sue xx 


Thursday, 24 January 2019

Sneaky peek 3

Day 3 samples using the dragon eyes mould and claws mould by Katy Sue Designs


On this one you can see the effect from the full mould, both left and right eyes. The horn like eyebrows are actually made from another Katy Sue mould, the unicorn lashes and horn mould.


And all the texture on the stems of both glasses was created using their continous bark mould.


You can see the way I painted the eyes in this close up and all the raised detail from using the mould.


I bet you cant wait till 29th Jan now, so you can get your hands on these incredible moulds.
But just incase your still thinking about it,
Check in tomorrow to see some more inspiration

I'm entering these challenges

Thanks for looking
Hugs Sue xx


Wednesday, 23 January 2019

Sneaky peek 2

Heres a couple more samples made using Katy Sue Designs, dragon eyes and claws moulds.


What do you think of my dragon egg boxes?

You can get your hands on these fabulous moulds and many more, by visiting Hochanda or Katy Sue Designs website from Tuesday 29th January.

I would like to enter my dragon egg boxes into these challenges:

Check back here tomorrow for more ideas how to use them
Thanks for looking
Hugs Sue xx


Tuesday, 22 January 2019

Katy Sue Designs sneaky peeks 1


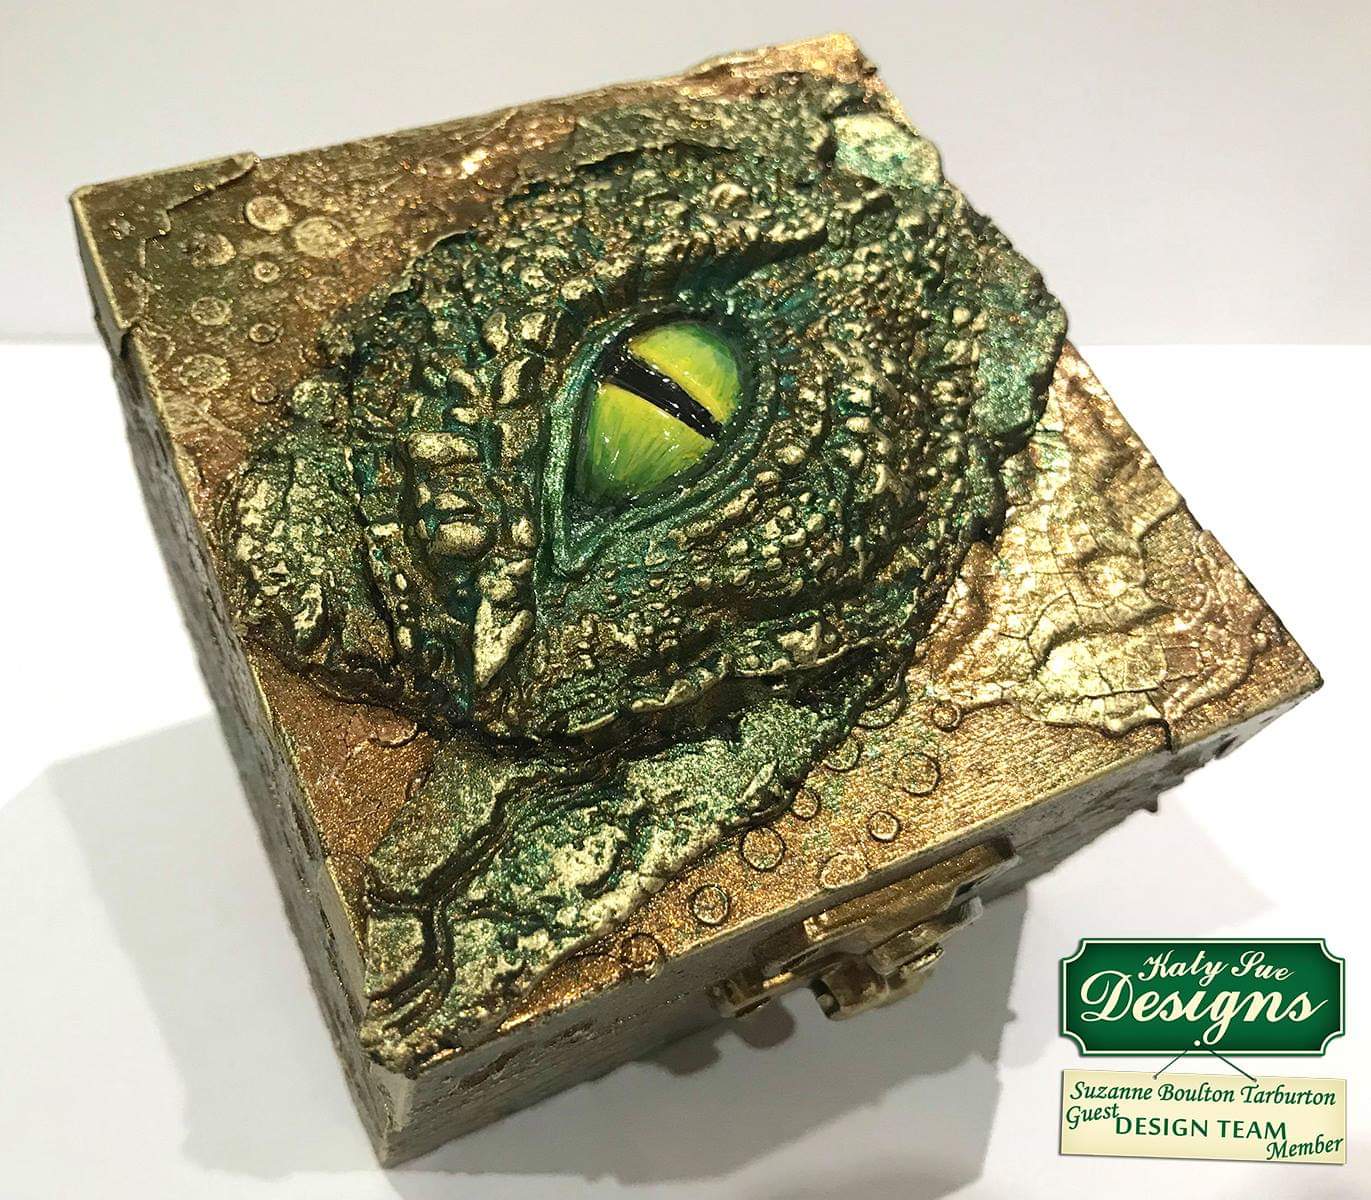
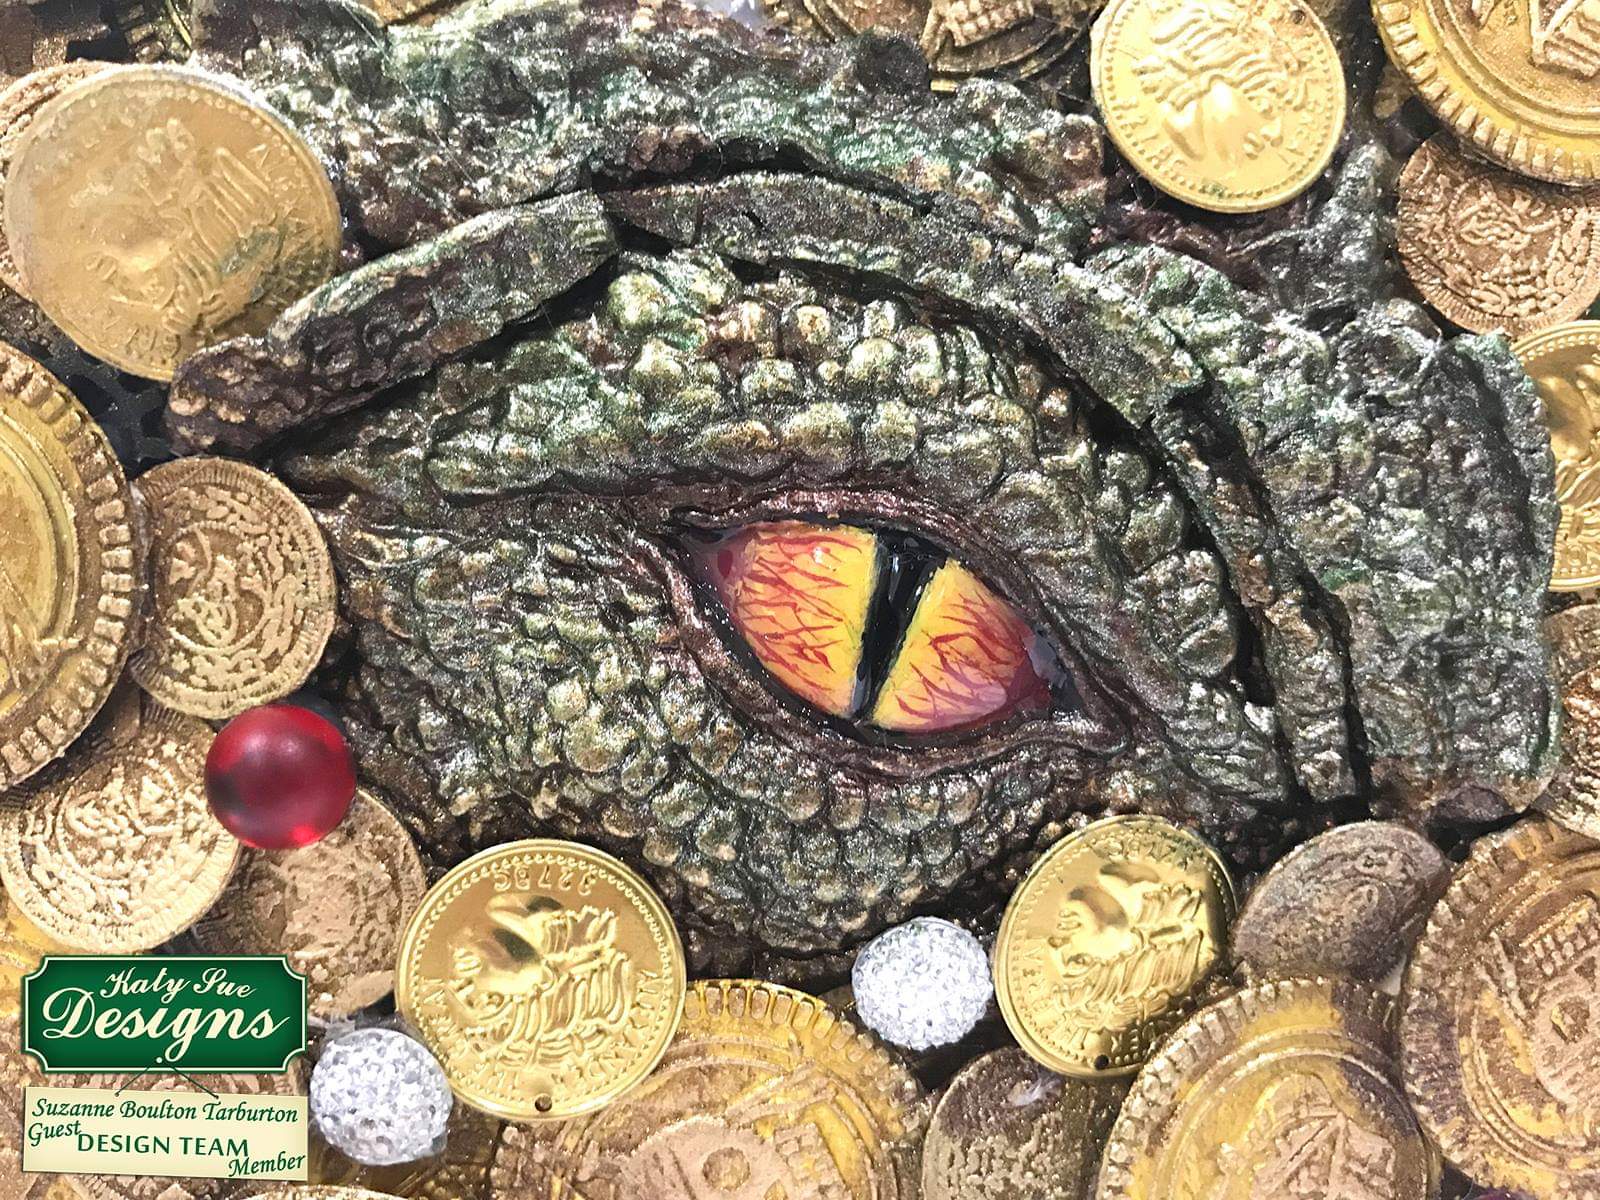
So here as promised is the first of my samples using the Katy Sue Designs new moulds. As you can see theres a dragons eye and three claws. The full eye mould is actually 2 eyes, left and right. 
This sample is a box canvas, and is a homage to Smaug the dragon waking up in the dwarfs treasure hall from the story "The Hobbit"

I used hearty clay in the moulds. Then once dry painted the eye using acrylic paint and Starlight paints on the surround and also on the claws.


I stencilled the canvas with texture paste and added jewels, coin charms and some very bright plastic pirate coins that I painted over and used gilding wax to tone them down.


Hope you like it :)
Please leave a comment and let me know what you think
Pop by tomorrow for another sample or two.

Dont forget to watch the show on Hochanda at 6pm and 8pm Tuesday 29th Jan and at 9am, 1pm and 5pm Wednesday 30th Jan

I hope its ok to enter this into

Hugs Sue x


Sunday, 20 January 2019

Guest Design Team Member


I'm so excited to tell you my news.

I was contacted in October by Antony Minnis, the creative director at Katy Sue Designs, he said he admired my work and asked if I would like to be a guest on their design team and make some samples using some new moulds they were in the process of designing. Of course I jumped at the chance and was sent a couple of the most amazing moulds a few weeks later. 
So I have been doing lots of secret crafting making samples which I am not allowed to share yet, but I will be sharing them with you next week, from Tuesday.

 I love Katy Sue Designs products and have used their moulds in my crafting for a number of years, my latest favourite being the gorgeous unicorn, which you have seen used in my crafting already on here. 
Just in case you missed it, here's some pics


Such a beautiful and detailed design dont you agree? They have since brought out a smaller version as well.

Thanks for visiting today and dont forget to call again all next week, as I will be showing the samples I made with the Katy Sue Designs new moulds. Six days of sneaky peeks starting on Tuesday.

They will be available to buy as a One Day Special on Hochanda, in shows starting at 6pm on Tuesday 29th January and throughout the day Wednesday 30th and believe me, they are not to be missed.

Hugs Sue xx


Monday, 14 January 2019

Quick catch-up

Good morning crafty friends, a quick post today, to let you know what I've been making on the lead up to christmas.
I painted some glass tealight holders with poppy and fuchia designs, as well as some small candles. 


These always sell well on my craft stall, so I painted up a few around the end of November. I painted some rose designs too, but forgot to take pictures.


I also cast some Dragon and unicorn resins and made them into note book covers.


Thanks for looking
Hugs Sue xx 


Willowing Art Lessons

Related Posts Plugin for WordPress, Blogger...