My lovely Followers

Showing posts with label Rhedds creative spirit challenge. Show all posts

Friday, 22 February 2019

Slightly rusty but still pretty

Here's another of my samples - 
A journal cover.
I couldn't make up my mind when I made this whether to keep it pretty with a bit of  sparkle or to go rusty grunge. So I did a bit of both 😁
I used the new rose embosser from Katy Sue Designs and some Starlight paint and some Rusty patina paint both from Imagination crafts.

Challenges:
Creative artiste mixed media challenge
Rhedds creative spirit
Altered eclectics

Thanks for looking 
Hugs Sue xx

Goblet fit for a queen

Good afternoon crafty friends, today I would like to share a goblet I made using the new moulds from Katy Sue Designs 


I do love decorating glasses, and the new peony embosser is simply stunning. I used Hearty clay and painted with Starlight paint from Imagination crafts.
Please check out the new range, Antony will be demonstrating them on Hochanda as a One Day Special next Wed 6pm and 8pm and then on Thursday at 9am, 1pm and 5pm.

Challenges:
Creative artiste mixed media challenge
Rhedd screative spirit
Altered eclectics
Hugs Sue xx

Saturday, 26 January 2019

Sneaky peek day 5

Heres my sample for today, its another notebook.
Using half of one of the new moulds, one eye, with another couple of moulds by Katy Sue Designs, fish, seaweed and seahorses.
I moulded them out of Hearty clay and once dry, painted them with Starlights by Imagination crafts.
The shells along the bottom are real shells.


In my mind ,this must be a water dragon :)


Ive only one more sample to show you so dont forget to come back tomorrow.

I'm entering these challenges

Thanks for looking
Hugs Sue xx


Friday, 25 January 2019

Katy Sue Designs sneaky peeks - Day 4

More inspiration for you.
You know how I love making my notebooks.
This one was made using the two new moulds along with the leaf mould, also by Katy Sue Designs

I used Powertex on the material to make it dry hard and hold its shape.


This is one of my favourite samples, which one is yours so far?

Challenges I'm entering:

Thanks for looking
Hugs Sue xx 


Thursday, 24 January 2019

Sneaky peek 3

Day 3 samples using the dragon eyes mould and claws mould by Katy Sue Designs


On this one you can see the effect from the full mould, both left and right eyes. The horn like eyebrows are actually made from another Katy Sue mould, the unicorn lashes and horn mould.


And all the texture on the stems of both glasses was created using their continous bark mould.


You can see the way I painted the eyes in this close up and all the raised detail from using the mould.


I bet you cant wait till 29th Jan now, so you can get your hands on these incredible moulds.
But just incase your still thinking about it,
Check in tomorrow to see some more inspiration

I'm entering these challenges

Thanks for looking
Hugs Sue xx


Wednesday, 23 January 2019

Sneaky peek 2

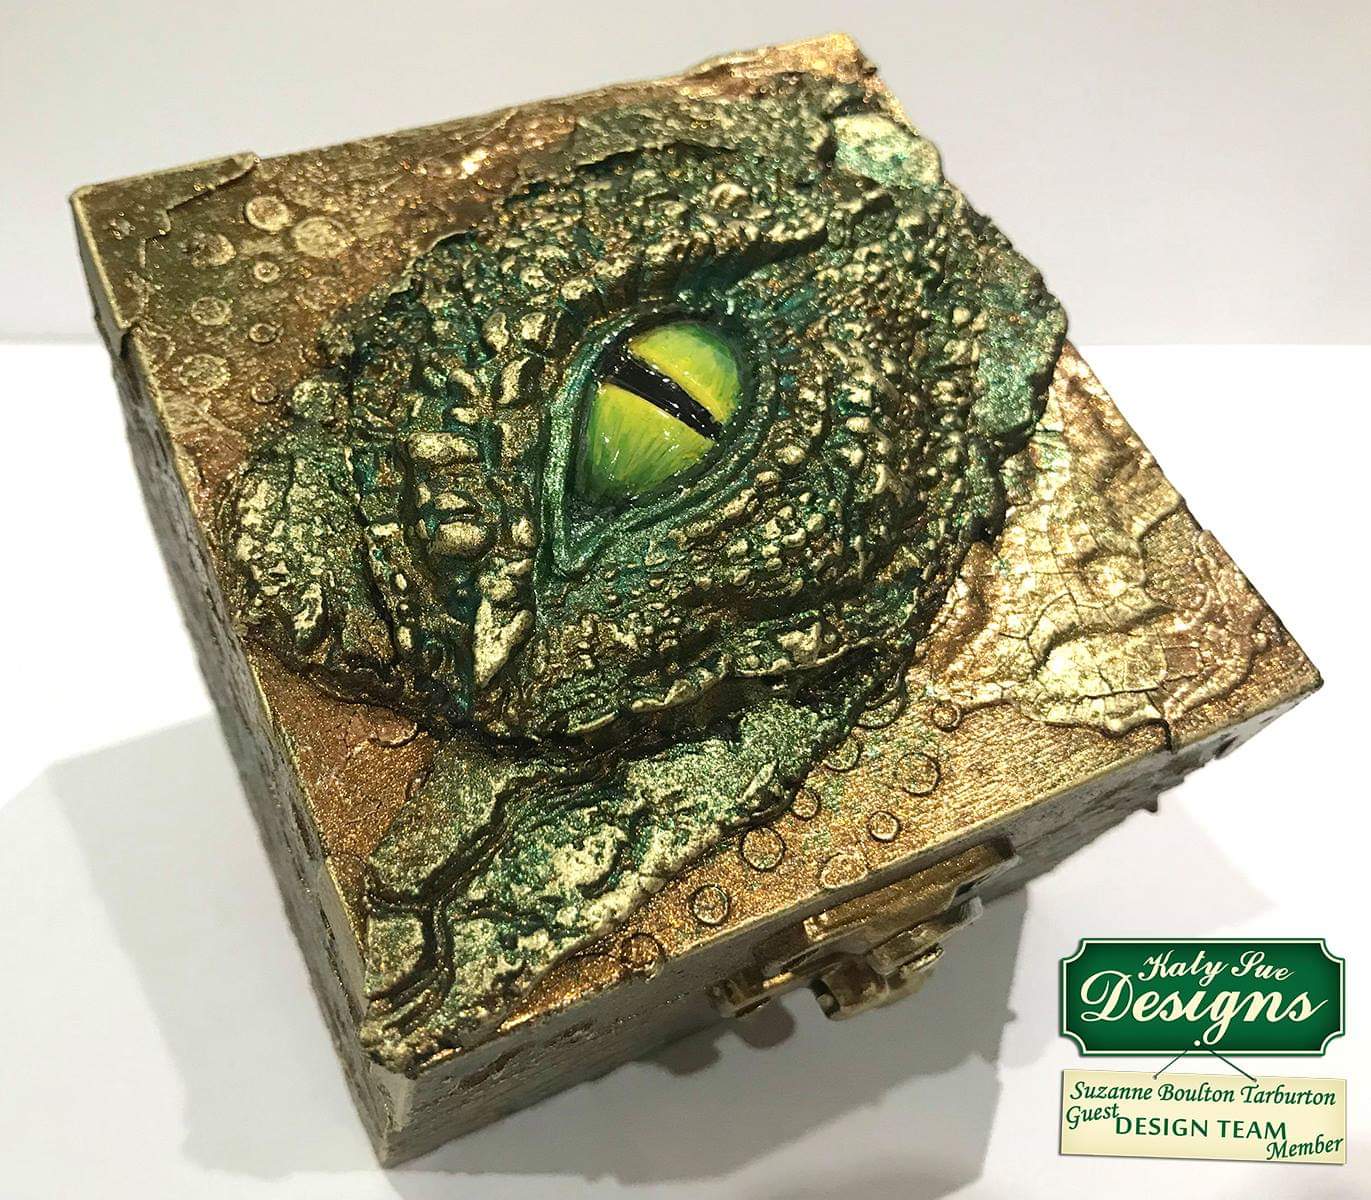
Heres a couple more samples made using Katy Sue Designs, dragon eyes and claws moulds.


What do you think of my dragon egg boxes?

You can get your hands on these fabulous moulds and many more, by visiting Hochanda or Katy Sue Designs website from Tuesday 29th January.

I would like to enter my dragon egg boxes into these challenges:

Check back here tomorrow for more ideas how to use them
Thanks for looking
Hugs Sue xx


Tuesday, 22 January 2019

Katy Sue Designs sneaky peeks 1


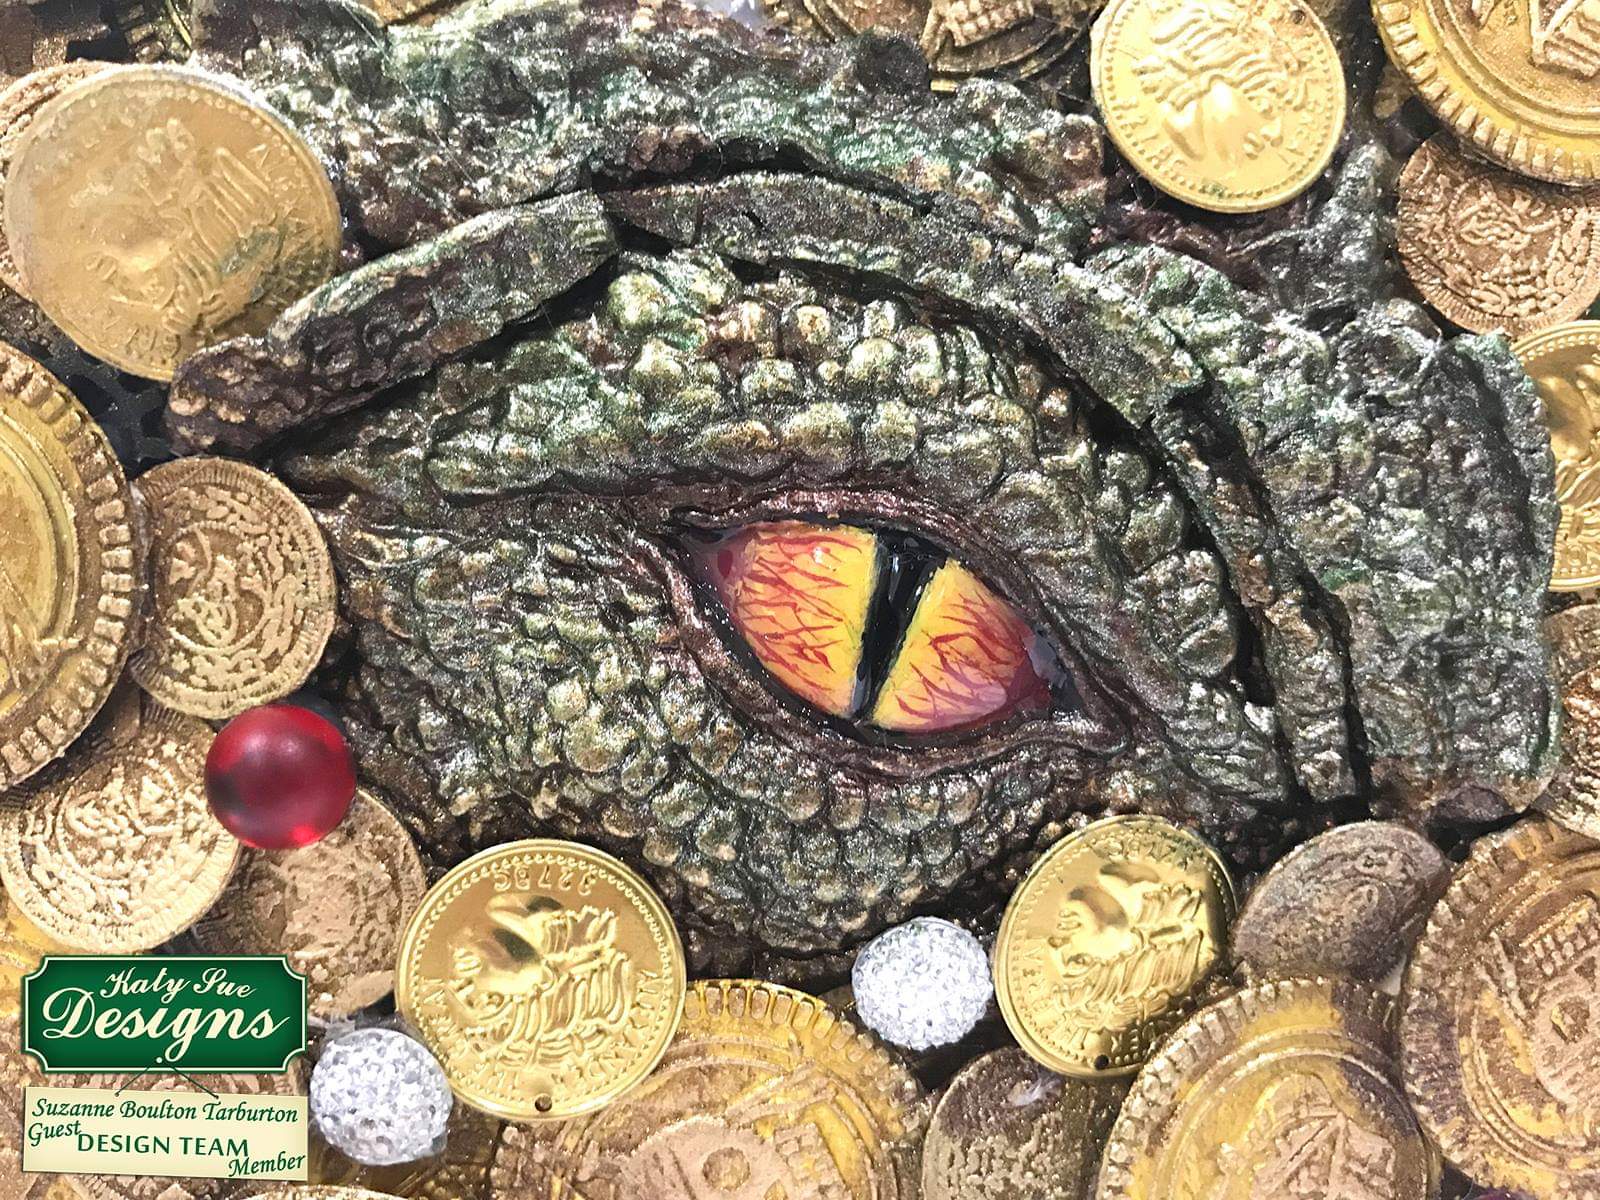
So here as promised is the first of my samples using the Katy Sue Designs new moulds. As you can see theres a dragons eye and three claws. The full eye mould is actually 2 eyes, left and right. 
This sample is a box canvas, and is a homage to Smaug the dragon waking up in the dwarfs treasure hall from the story "The Hobbit"

I used hearty clay in the moulds. Then once dry painted the eye using acrylic paint and Starlight paints on the surround and also on the claws.


I stencilled the canvas with texture paste and added jewels, coin charms and some very bright plastic pirate coins that I painted over and used gilding wax to tone them down.


Hope you like it :)
Please leave a comment and let me know what you think
Pop by tomorrow for another sample or two.

Dont forget to watch the show on Hochanda at 6pm and 8pm Tuesday 29th Jan and at 9am, 1pm and 5pm Wednesday 30th Jan

I hope its ok to enter this into

Hugs Sue x


Tuesday, 28 August 2018

Dragon eye altered journal cover

Just think Smaug the dragon waking up in that classic scene from the Hobbit. That was my inspiration for these journal covers.


I made the eyes by handcasting resin in a mould and and then building around it using clay and some texture stones. I painted the eyeballs with acrylic paint and once dry applied a couple of coats of Glossy Accents.

Before I applied them to the mountboard cover, I used texture paste through stencils to add background texture.

Once I stuck on the eyes and built round with clay, I also added some texture stones, metal cogs and some coins. This was to give the idea of Smaug laying on all the treasure.


I decided this one was a water dragon so coloured him with a base of blue.


After painting with the base colours, using starlight paint, I then rubbed over with different coloured guilding waxes to pick up on all the textures.


I really love them and am in the process of making more and I decided to do something similar on a canvas. But you'll have to wait to see that one as I think that might take a while to complete.

Challenges:
Rhedds creative spirit.-august-challenge ( it is a board cover, but if not allowed I apologise)


Monday, 27 August 2018

Dragon Boxes


Good morning , I hope if you live in the UK you are enjoying your bank holiday, and if you live else where that you are having a great day too.


I have always been a fantasy/ magic fan especially dragons, I'm facinated by them, so I've really enjoyed making these dragon boxes.


I made the baby dragons from paperclay so they are very lightweight .


To get lots of texture I used texture paste through stencils,

Powertex mixed with 3d Flex, which creates a crackle effect.


Die cuts and ripped pieces of cardboard also painted with brown Powertex, gave texture to the top.


I painted the dragons with Starlight paints and rubbed over with guilding wax.


And the boxes were painted with various acrylic paints mixed with sand and coloured guilding wax


Challenges;


Willowing Art Lessons

Related Posts Plugin for WordPress, Blogger...